


Importing reads what your accounts already run. The project starts in watching mode.
Import from Desktop
- Connect every account that holds part of the project, for example a Railway account for the backend and a Neon account for the database.
- On Projects, find Found on your providers and select Review and add.
- Each provider project goes into a Hoista project of the same name. Change where it goes, untick what to leave out, or drag a resource to another project.
- Import, then open the project and check its Map.
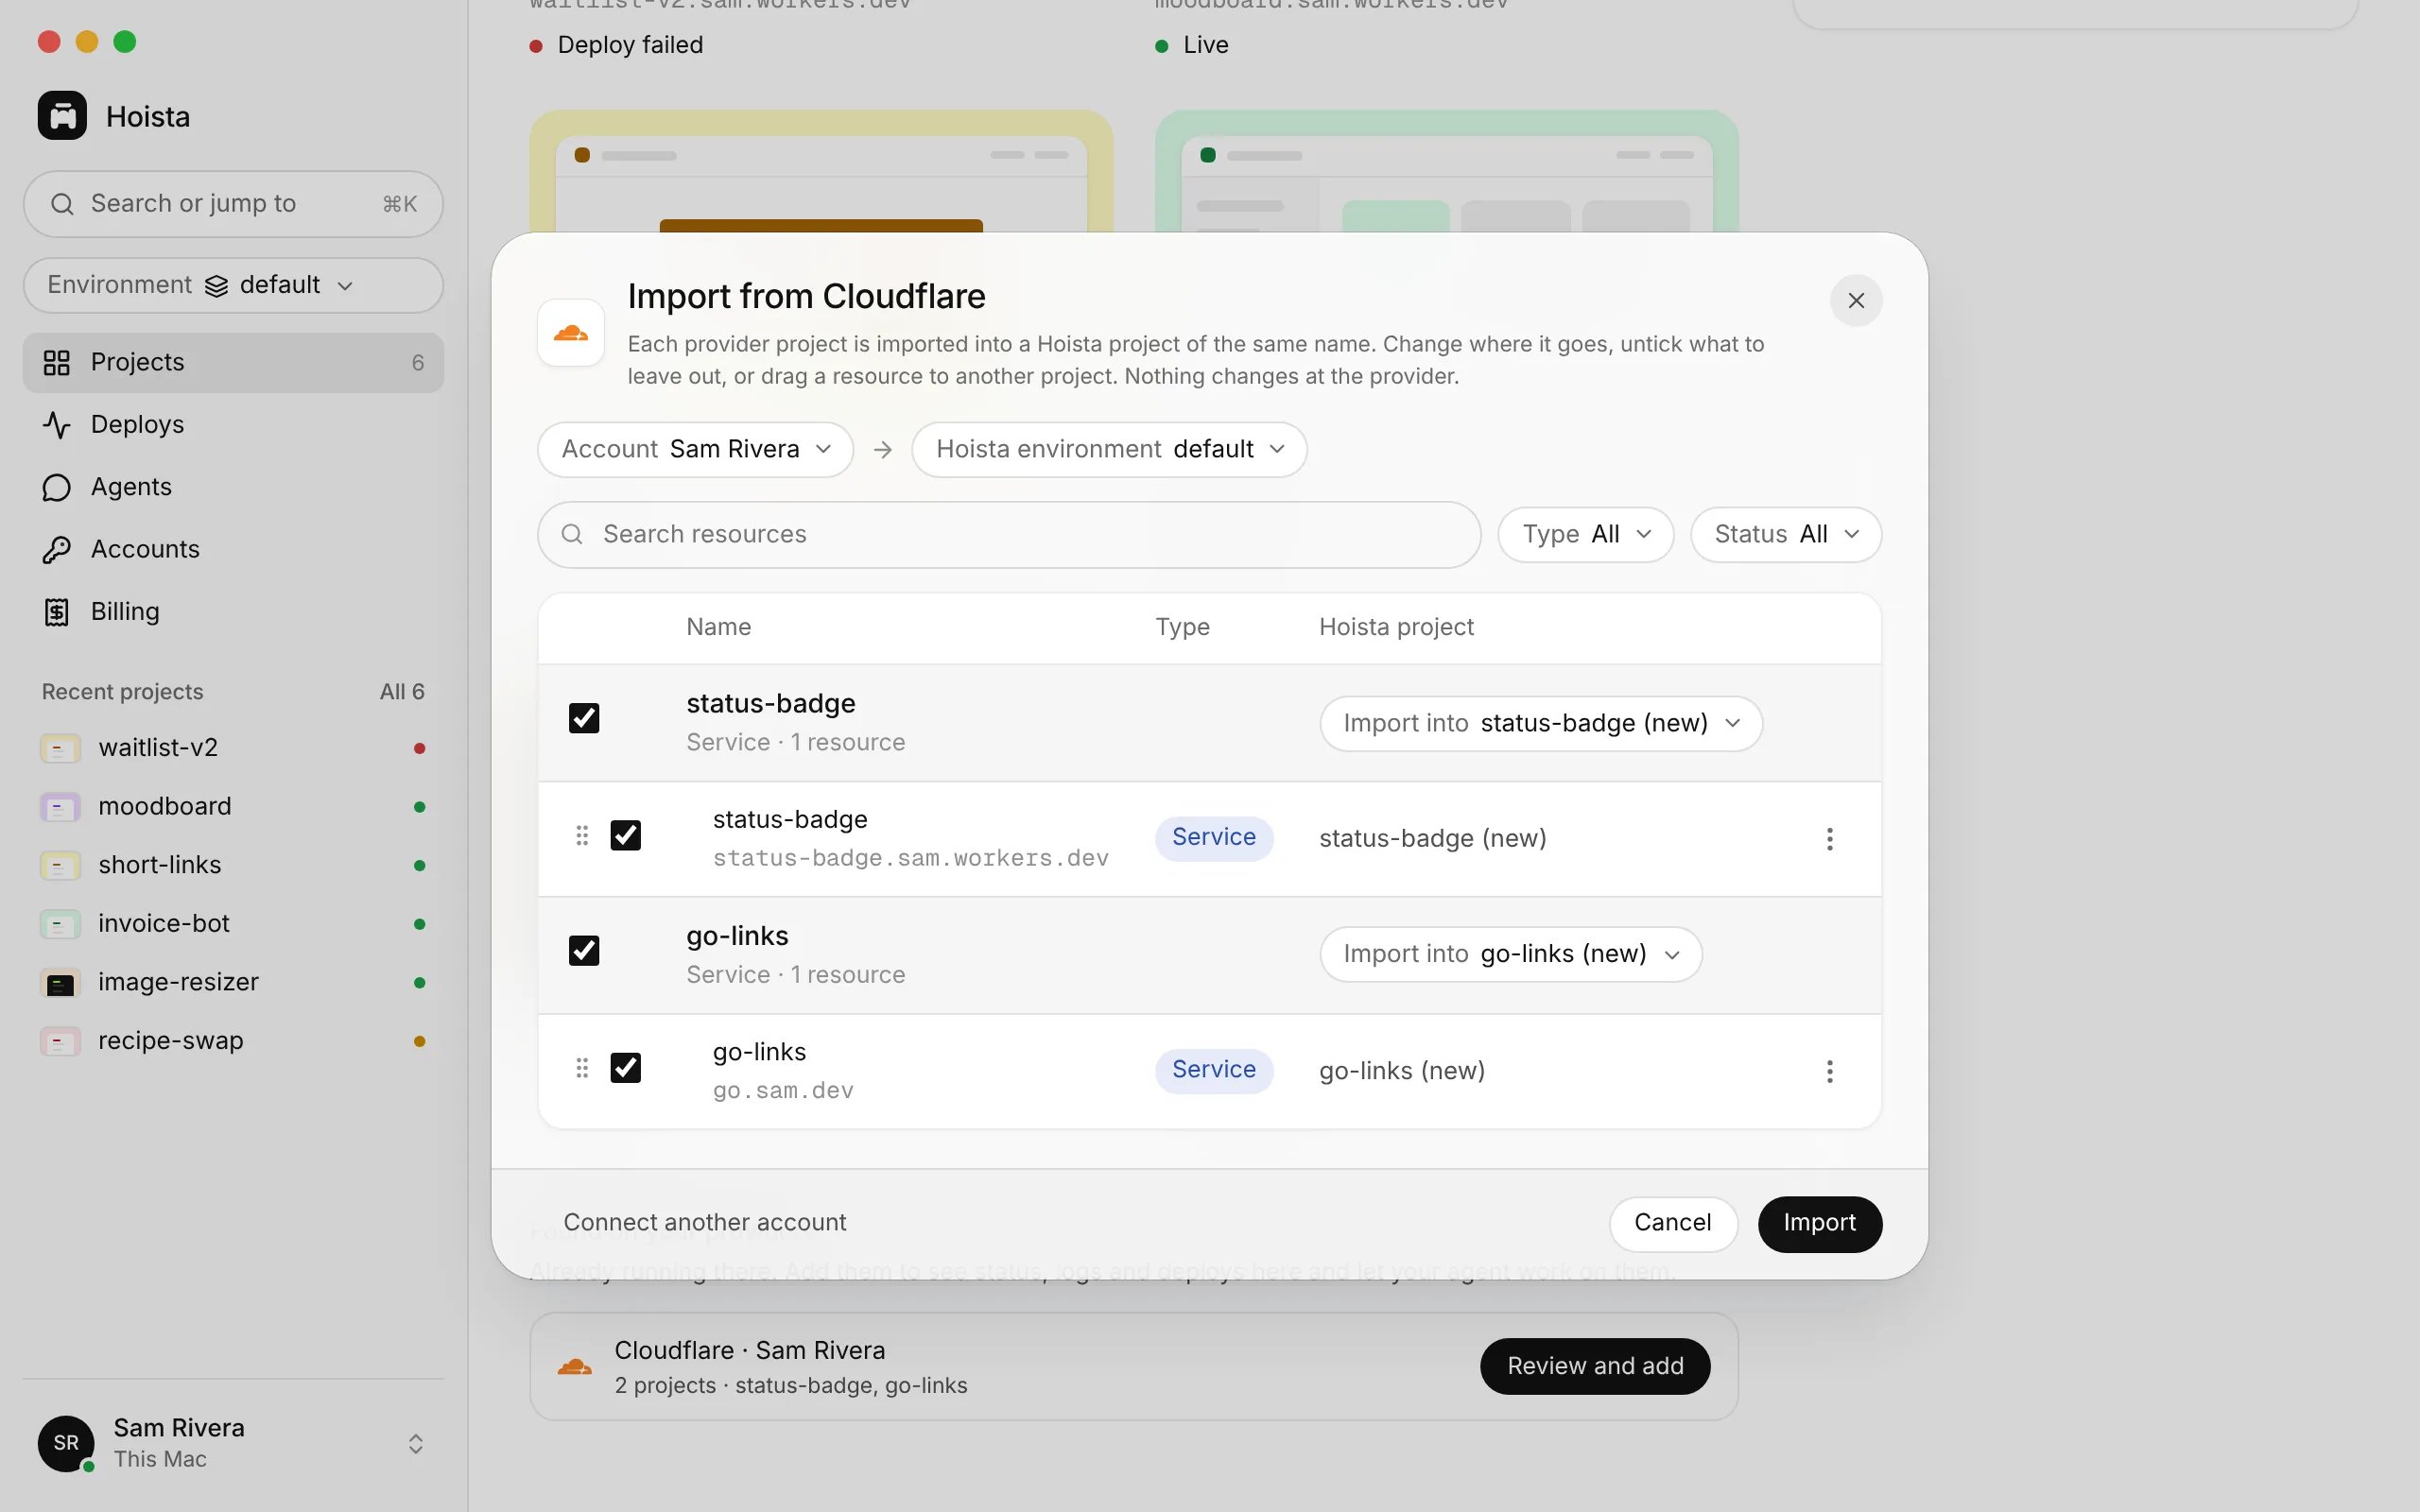
Importing from Cloudflare. Each provider project becomes a Hoista project of the same name.
Import from the CLI
hoist import lets you pick from a list instead. To add another resource later, run hoist import RESOURCE_ID --project my-app. A resource can belong to only one project.
To set aside resources you don’t want, run hoist import hide RESOURCE_ID. List them with hoist import --list --hidden and bring one back with hoist import unhide RESOURCE_ID. Hiding only changes Hoista’s list. It does not pause, delete or stop billing for anything.
Fix the grouping
On a resource’s page, use Move to another project or Remove from project. A removed resource goes back to Found on your providers. To drop a whole watched project from Hoista, use Stop watching in its Settings. None of these change anything at the provider.Manage the project with Hoista
Link the folder or GitHub repository the project builds from. In Desktop, open Settings and use Source. Then switch the mode from the CLI:hoist link my-app --repo OWNER/NAME, with --branch if it isn’t the default branch. hoist projects watch my-app switches back to watching.
Linking a source does not switch the mode by itself. Keep your existing database and its data unless you have planned a migration.
Ask an agent for an overview
Related
Connect hosting accounts
Connect, check and rotate accounts.
Plan and deploy
Deploy once the project is managed.
How Hoista works
Projects, resources, watching and managed.